Creating a Guide Layout In Photoshop CC

In this article we are going to learn about the guide layout feature in Adobe Photoshop CC.
Previously, to create a guide layout like what I have here, we had to create them by manually by dragging all of the guides from the rulers, or by using add-ons like Gridify to create an automatic layout. Adobe has now incorporated that automatic feature right into the software.
Accessing the Photoshop Guide Layout
To access the Guide Layout option, go up to the View menu at the top of the screen and choose New Guide Layout.
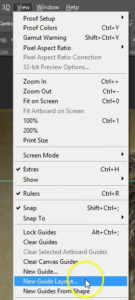
You’ll see the guide layout box open up. Note that this is only available in Photoshop CC.
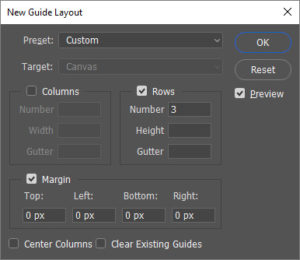
Guide layouts allow us to easily add any number of rows and columns to our layout. We can specify an exact width for the columns or an exact height for the rows. We can also add a gutter between the guides, and add margins along the outside of the document.
If you haven’t used this feature before, the box will be populated with the default settings of eight columns, each separated by a 20 px gutter.
You can add guides to the ones you already have in your document, or you can clear the existing guides and only add new ones. This is done by checking the little box in the lower right.
![]()
If you don’t see the updated layout while your entering values into the fields, make sure “Preview” is checked on the right.
Using Gutter Spacing
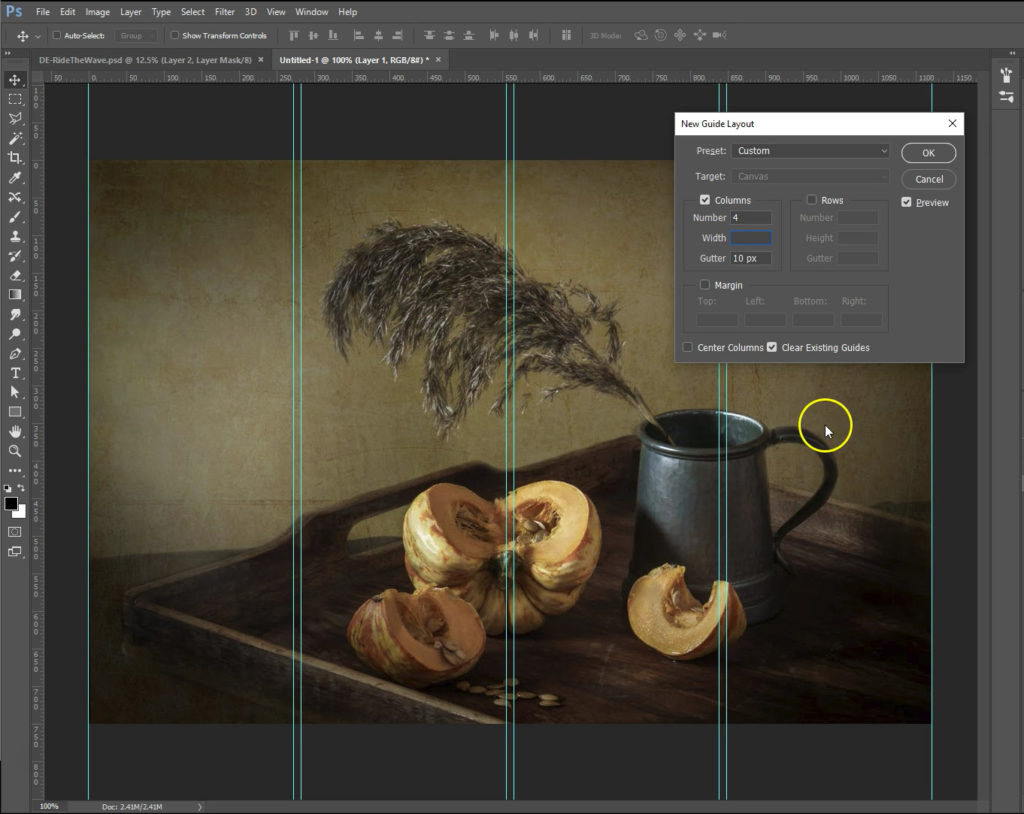
The space between columns and rows is called the gutter. By default Photoshop sets a 20px gutter, but you can change this to anything you need it to be. For instance if you need a document with 4 columns that each have 10 pixels of space between them, you can easily do that with the gutter spacing.
Setting Column Width
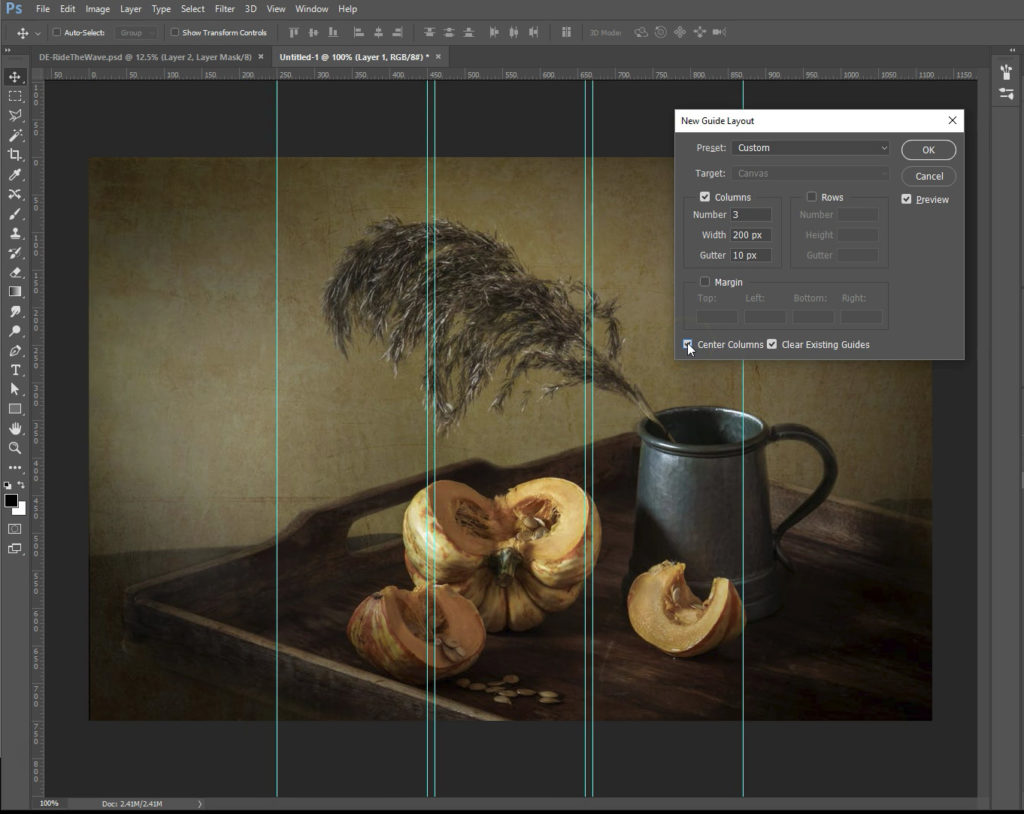
By default, Photoshop will create equally spaced columns, but you can set the width yourself by entering a value into the Width field.
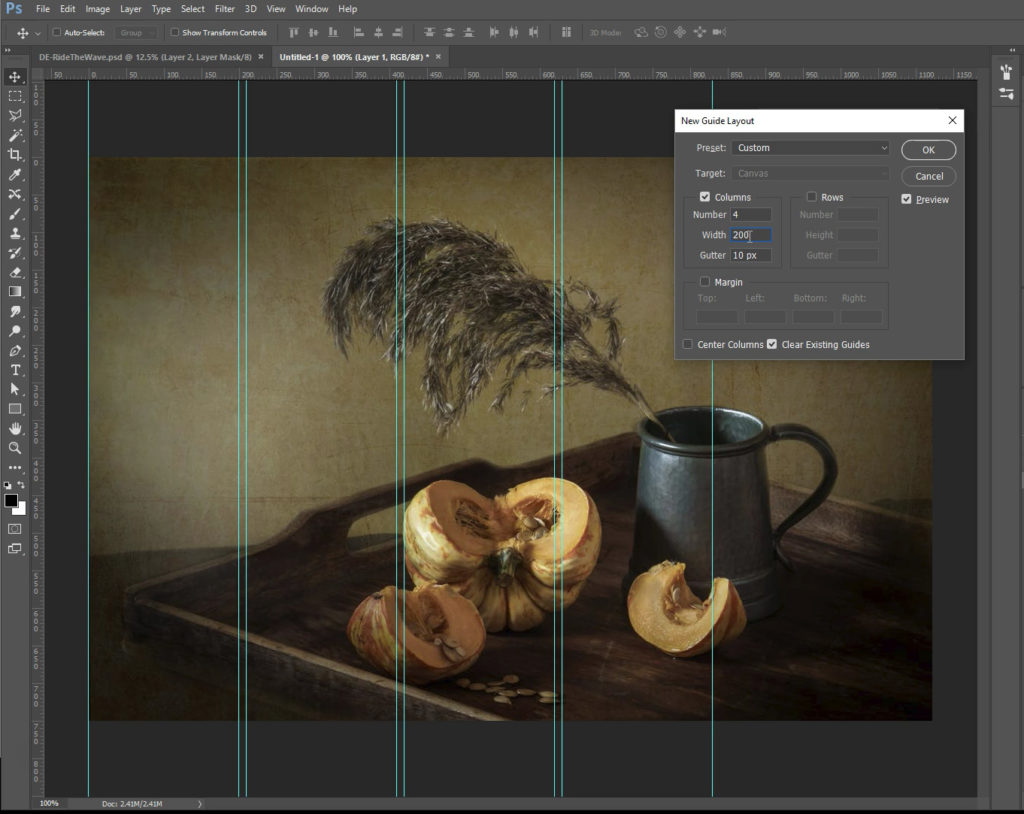
If we don’t want them all on the left, we can center the columns to the middle of the document by checking the “Center Columns” box in the lower left.
You can add rows in the same way as columns. First check the “Rows” box, then add the number of rows, height and gutter.
Adding Margins
To add margins around the edges of the document, first select the Margin option to enable it, then enter the amount of space you want to add in each box for Top, Left, Bottom and Right.
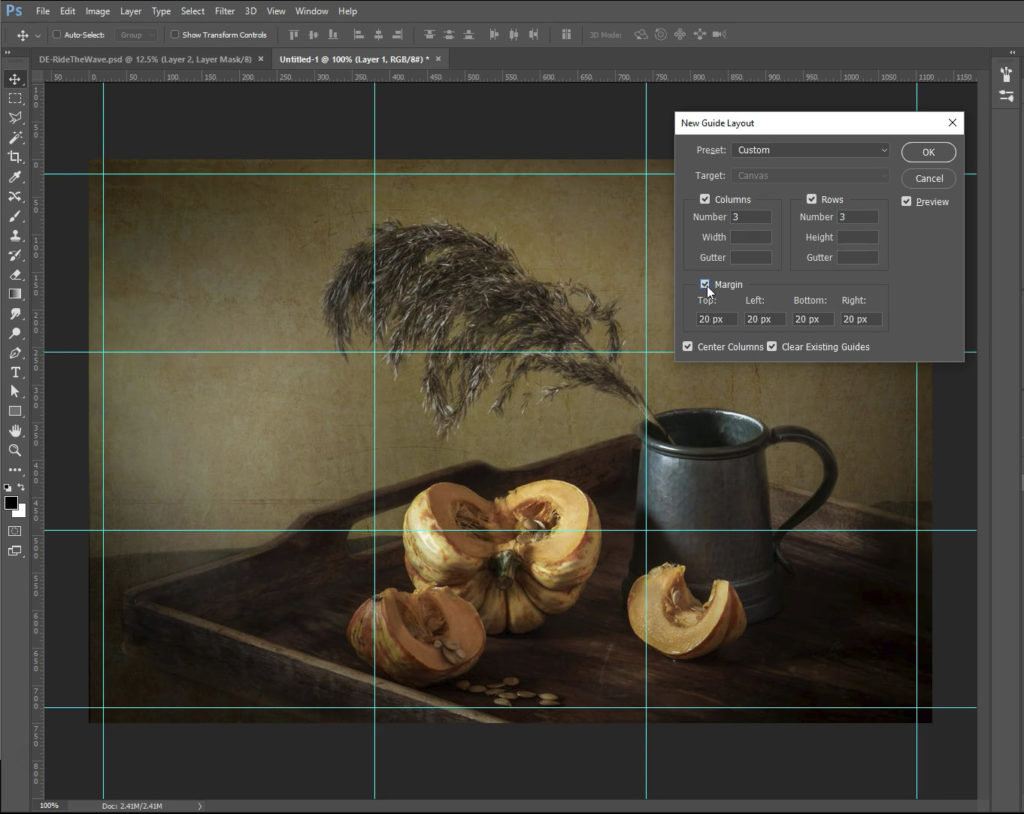
Negative values could also be used to send guides outside of the document bounds if needed.
Saving Custom Layouts
If you have a layout that you know you’ll need to use often, or even just more than once, you can save it as a preset. For instance, I have a layout saved that adds guides to the edges and centers of the document.
To save a custom preset, click on the “Preset” drop down and select “Save Preset”.
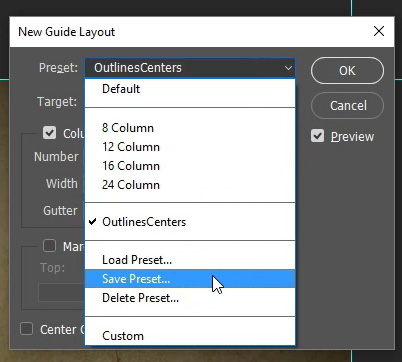
A window will pop up for you to choose where the preset will be saved. Name the preset and click the “Save” button. The new preset will show up in the drop down list.
And that’s all there is to using the Guide Layout feature in Photoshop CC.
Watch the Video
Watch the Photoshop guide layout video to see it in action.
I hope you found this article to be helpful. Comment below to and let me know what you think.
Check out the Photoshop Foundation course on Udemy to learn Photoshop basics.
