Add An Account to Google Backup & Sync
Need to sync more than one Google Drive account to your computer? This article will show you how to do that!
Backup & Sync is an amazing tool that allows you to synchronize your cloud files to your desktop computer. For a long time you could only sync one account to your computer. So if you have a personal account and a business account, you had to pay for a service that would manage multiple accounts synchronizing with your PC.
Fortunately, that’s not the case any longer! A little while ago Google added the ability to sync more than one account at a time.
Getting Started
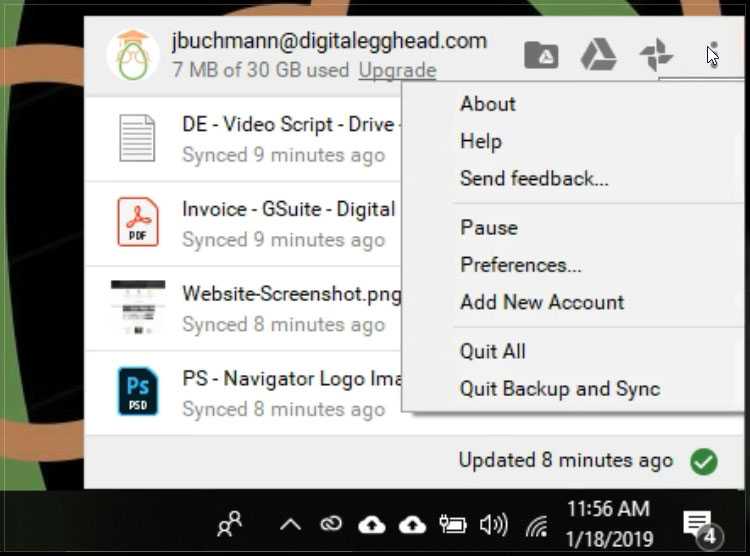
Take a look at your taskbar in the lower right hand corner of your screen. If you’ve already installed Back Up & Sync, then you should have a little cloud shaped icon in the taskbar. This will all look a bit different for Mac users, but it should work out the same way.

Click on the cloud icon and a small window should pop up.
In the upper right corner of the pop up, click on the three dot menu icon. Then select “Add New Account”
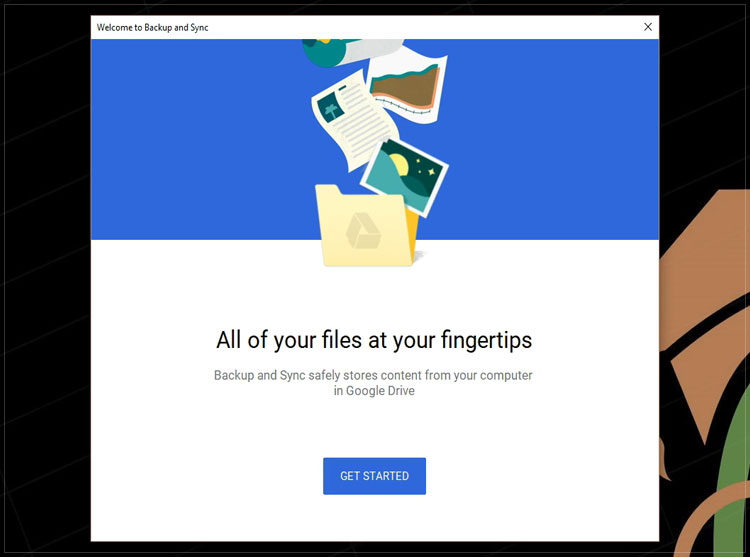
A new window will open to start the process. Click on the “Get Started Button”
Then sign in to the Google account that you want to sync.
Once You have successfully logged in you will see a message that tells you that these new files can be found in the “Computers” tab in your Drive account online.
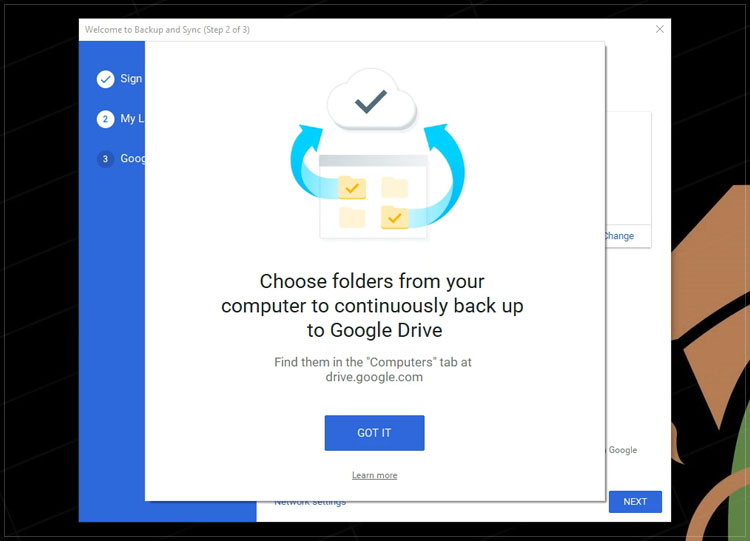
Click on “Got It” to proceed.
Choose Files to Sync Up to the Cloud
The next screen presents you with some options, starting with which folders you want to sync.
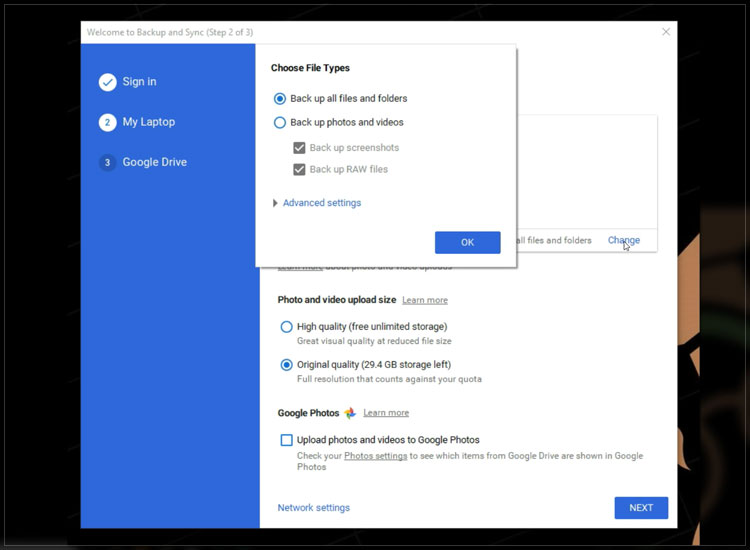
It has some default folders checked. You can leave those checked, or select new folders by clicking on “Choose Folder”.
A message to the right of that link displays that Drive will be backing up all files and folders in this location. If you click on “Change”, you will see that that you have the ability to tell it more specifically which files and folders you want to sync.
You can choose to only backup photos and videos, or click on “Advanced Settings” and add specific types of files that you don’t want to be included.
For instance, maybe you don’t want any .pdf files to back up in this account. You can add “.pdf” in the box, click on “Add”, and files with that extension won’t be backed up.
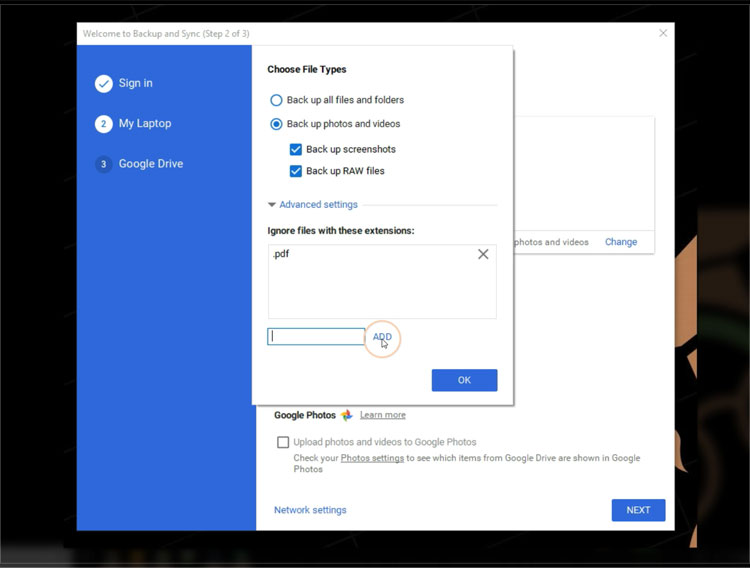
Next, you have an option for photo backups.

Choosing “high quality” will back up a slightly compressed version of your images, but it will not count towards your storage quota. The images still look good, so this is a pretty nice option to have so you can take as many pictures as you want without worrying about space.
If you need the original, full quality images backed up, you can select that instead. But it will count towards the space you have available.
The last option at the bottom is for Google Photos. If you check this, Google Photos will track and organize images backed up for this account.

There’s also a Network Setting option at the bottom, but most people don’t need to worry about that.
Click on “Next” to move forward.
Choose Files to Sync Down to Your PC
What you just did was tell Drive what files from your computer you want to sync up to the cloud. Now you’re going to tell it what you want sync down from the cloud.
Click on “Got It”, and you will be presented with a very similar looking window. By default, it will sync everything from your “My Drive” folder. Which is everything you have in the account.
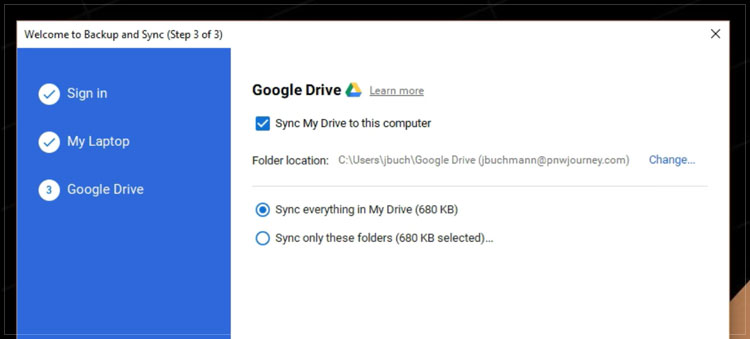
If you uncheck the box, only files you add to the folder on your PC will be synced up, and items added directly to the cloud will not be synced down.
A default location where the files will be stored on your computer is shown. You can change that if you wish.
Lastly, choose if you want all of your “My Drive” files downloaded, or just certain ones. Make your selection, then click on “Start”
You’ll see a new cloud icon in your taskbar, and it should be displaying the rotating arrows. Indicating that it’s synchronizing.

And that’s it! You now have more than one Google account synced to your computer.
Watch the Video
Watch the video see the Backup & Sync setup process in action.
