Using Indents in Google Docs
Indentation in Google Docs is super easy, and there are a few ways to do it. This article will show you how.
Setting up an indent
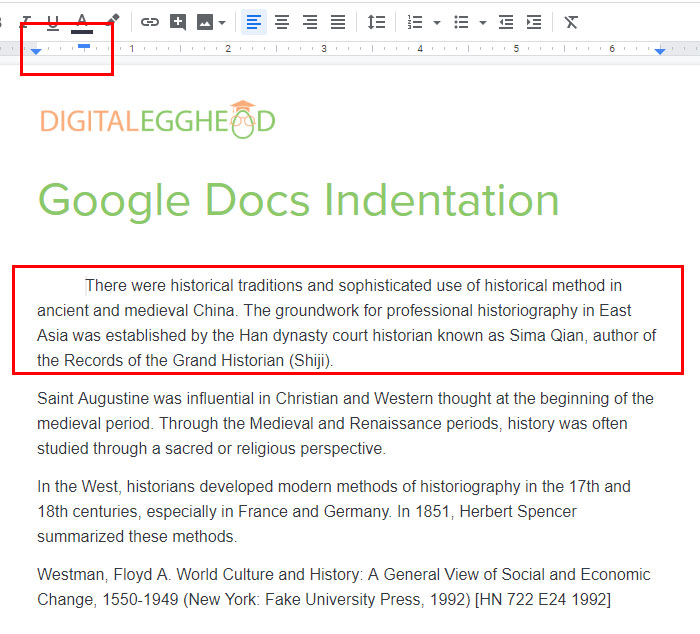
I have a document open with some random text that I want to add indentation to. The quickest, and probably the easiest method is to use the blue margin arrows at the top of the page.

If you click on the downward facing arrow on the left side and drag it to the right, you’ll see an indentation happen for the paragraph where your cursor currently is.

In this case, the entire paragraph is indented. Notice that the arrow and the line above it both moved. If you want only the first line of the paragraph to be indented, click and drag the only line above the arrow.

What if you want to do this for all of your paragraphs? To do that, just highlight all of the paragraphs you want to have indented, and drag the triangle or the line to the right.
Once you’ve set the indent for your paragraphs, pressing the Enter will keep the indent for new paragraphs as well.
Hanging Indents
There is another type of indentation called a hanging indent, which is essentially the opposite of indenting the first sentence. A hanging indent will indent everything but the first sentence. This is commonly used in bibliographies.
To do a hanging indent, you can highlight the paragraph you want to indent and drag the arrow to the right. Then drag the line above the arrow back over to the left and the selected paragraph will now have a hanging indent.

Setting Indents Using the Menu
Another way to set indents, which can give you a bit more precision, is to use the toolbar and menu options.
In the toolbar there are a couple of icons for increasing and decreasing the indent.

Clicking on increase will move the paragraphs 1/2″ to the right, and decrease will do the opposite.
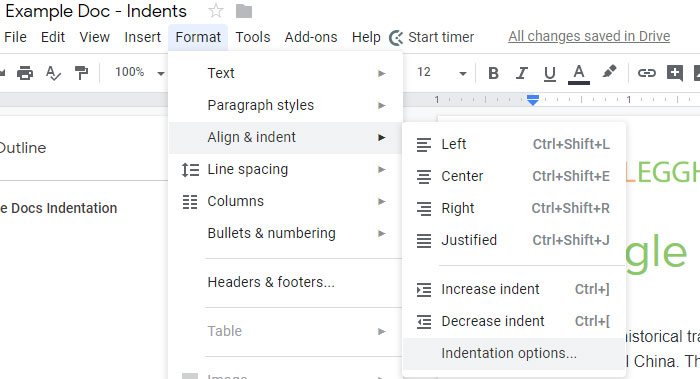
You can also go to the menu and click on Format > Align and Indent and you will see the same Increase and Decrease options as the toolbar.

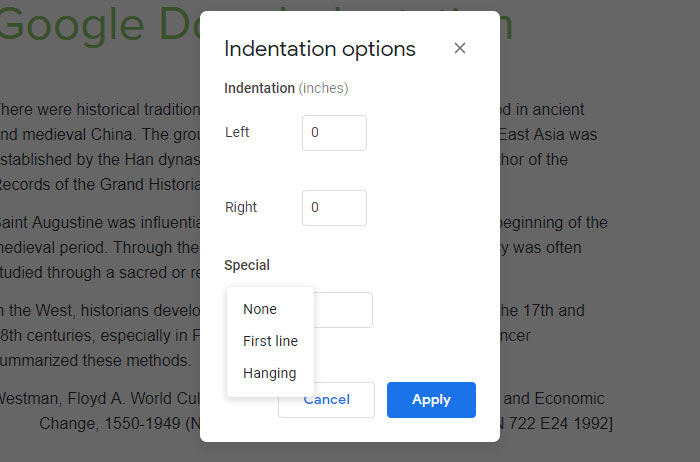
At the bottom of this menu you will see “Indentation options…”. This is where you get more precise control over your indentations by entering specific left and right values, which will apply to the entire paragraph.
Clicking on the “Special” drop down will allow you to set a specific value for the first line or hanging indents. Once you have set your values, click on “Apply” to see your changes applied to the selected paragraphs.

And that’s it! Now you know all of the ways you can set indents in Google Docs.
I hope you found this article to be helpful. Comment and let me know what you think.
Learn more about Google’s amazing office apps with the Google Cloud Productivity course on Udemy.
Watch the Video
Watch the Google Docs Indentation video to see it in action.
